Sunday, October 26, 2014

Halloween Tombstone Mini book, Witch, Graveyard, Background Scene

Hello Readers,
It's Wednesday
and I am so excited about my post today
and for the next few weeks!

Hey returning designers,
do you remember the cool stuff we
got from Gina's Designs?

I was sooo jealous when I saw what you received 
and then tried to figure out what to do with what I received!

A TOMBSTONE with a fence!

Well, it is now time to share with you my take 
on this tomb stone, I have waited for Halloween to come closer
so I could use this fun chipboard cutout from Gina"s Designs.


Here are my pieces.
The tombstone, 2 fences, and a base.


I painted the fence and base black,
I then glittered the fence with black glitter and glue.
Then I covered the tombstone with Black glitter trees.


Here are the beginnings of the tombstone scene.

After I had it glued together I thought,
mmmm, I have enough room inside the fence to create a book.
So here is the project completed.
I will use 3 posts to show you all the steps to get
to this cute Halloween scene starting with the 
Tombstone.


Here is the completed Halloween scene.
Inside the tombstone garden area is the Wicked mini book 
I created.


Close up on the book inside the fence. and the decorated fence.


Close up of the front of the book.


When you take the book out of the fenced in area,
here is what the finished tombstone looks like.

Soooo Halloween!

I chose only 4 colors to work with on this book.
Black, orange, white, and grey.
So, I went through my Halloween file and pulled out anything I had in just those 
colors, I also pulled out my black and white file,
so I could integrate any papers that may work with just
those colors.
You may not use all the things you pull out,
but it is so helpful as you work your project to pull everything 
out that could be used on your project, having it all close
to your fingers and inspiring you to design a great project.


I also purchase a Halloween embellishment every year that is 
new to the industry, Usually, it is an EK Success embellishment 
that is very 3 dimensional.
Here on the front of the fence is the white pumpkins, 
(I purchased them several years ago)
They just work so good throughout the whole project.
I also chose papers that make you feel like you are in a graveyard.
Glitter Black Trees is one of my single favorite papers 
for Halloween.  This paper has been with us for years
and is a Halloween staple in the Robin's Nest Halloween grouping.
Black Glitter Trees is covering the tombstone and
 is the cover for the mini book.


I also embellished the tombstone with
Black 6mm dew drops
Black diamond drops
Orange Glitter Crackle CS (rosette)

I cut out the lettering on Cricut.
Isn't that so funny!
I maybe should add a R.I.P. too.

Of course we need a witch for this tombstone.
Here are the products I used to create her.


Black burlap
orange and black stripe ribbon
Black sparkle ribbon for her boa
Gina's Designs dress form (very thick wood)
Black thin ribbon


Our witch is such a fun addition to our Halloween scene.
I cut the burlap into a strip and gathered the top edge,
I also sewed a orange and white ribbon around the bottom edge of 
her dress.  Then I tied the dress onto the dress form after I painted
it black.  I tucked a corset into the top of the dress 
and glued it onto the dress form.
I forgot to tell you that the corset and the dress form are also
from Gina's Designs.  
I used the black sparkly ribbon as a boa,
added a few spiders, a Robin's Nest hat sticker
and a few brads to the dress as embellishments.
She turned out pretty cute!


Here she is in front of the Wicked mini book.
I will show the mini book in one of the next 2 posts.


So here again is the finished Halloween scene.
Tombstone scene, with a
Wicked Mini Albun
a witch
and a framed back ground behind the 
Tombstone.

Are you getting ready for Halloween?
This really makes me want to pull down those 
stored away boxes and bring out
Halloween!

Robin's Nest Papers and Embellishments are found
on our website

Ciao,

Robin


Friday, October 24, 2014

Halloween Tablescape

I love to set the table for special occasions,
and for everyday.  So I am always
trying to come up with new ways to
set our table.

I love to shop the second hand stores to find new (to me)
dishes to have to set new tablescapes.

It sometimes is hard to find really good finds,
but just recently I found some black dishes.
Perfect, I thought, for
Halloween!

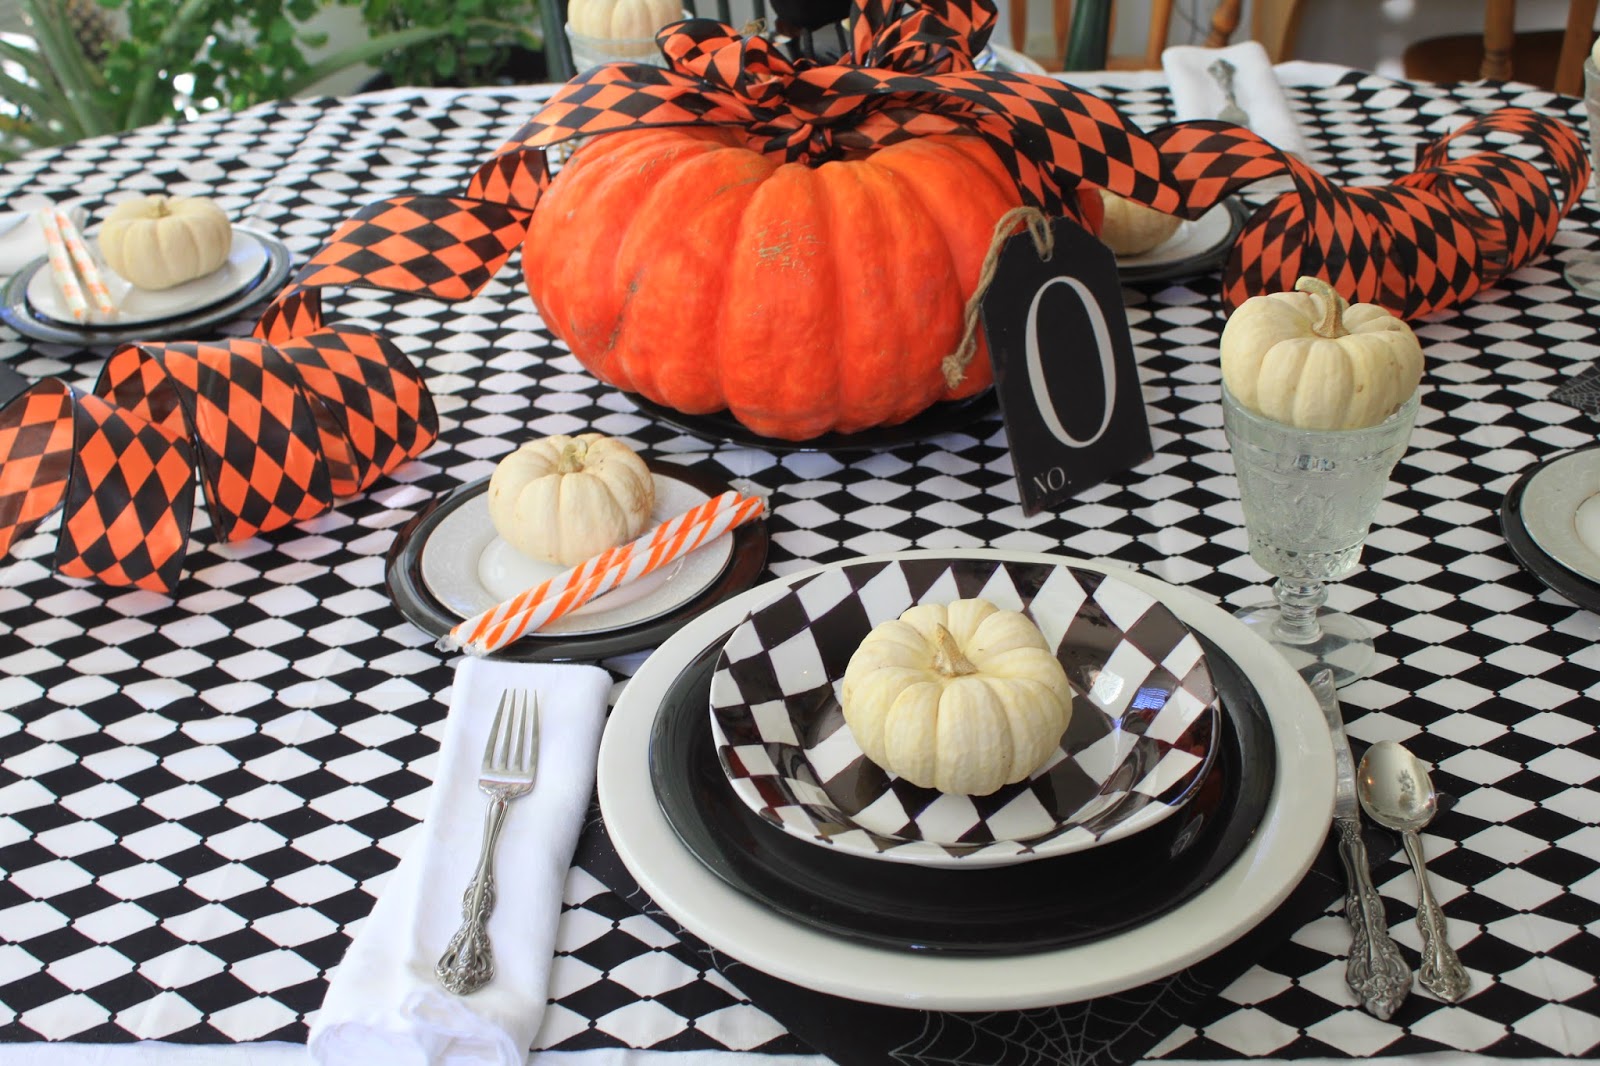
So here is my tablescape for Halloween.


I found  diamond shape fabric at JoAnns,
I just bought 2 yards and put it on top of a white 
tablecloth.
Then under each of my plates I put a sheet of 
black glitter spiderweb cardstock
found on our website


A princess pumpkin for my centerpiece on the table
topped with a black crow and black and orange diamond ribbon.


I bought 4 white plates at the dollar store and colored them in 
black felt pens to make the diamond plates.


In my garden I grew these cute mini white pumpkins.


White charger plates and black dinner and salad plates were found
at the second hand store.


I added a 'O" tag in black for O'Crowley.


The white and gray salad plate is from my mother's
china that our family would eat off on special occasions
.

This turned out to be such a cute tablescape.
It makes the kitchen/dinning area feel so festive!


Hope you have a fun Halloween.


It's just so fun to have this in the house!


See how fun just a piece of 12x12 paper can add to you 
tablescape!


Have a great October!

Ciao,

Robin


Wednesday, October 22, 2014

Halloween Tombstone Scene

Hello Robin's Nest Readers!
It's Wednesday again,
and I am sharing with you more of our
Halloween scene.

Halloween is close!

The background of our Halloween scene.


I used Haunted House Cardstock
12x12 sheet chipboard
12x12 frame sprayed black


I then added Orange 6mm dew drops
Black 6mm dew drops
Black diamond drops
Orange tear drops


a few glitter bats


and a few white pumpkins.


And here is my background to the Haunted House 
Halloween Tombstone mini book scene.


Here it is as the background of this cute Halloween scene.


Next week is our Wicked Mini book,
I honestly cannot wait to share
this with you!!!!

Find all the Robin's Nest Products on our website


Happy Halloween!

Ciao,

Robin


Sunday, October 19, 2014

Halloween Tombstone Mini Book

Hello again,
Robin's Wednesday.
Sharing the Tombstone Mini Book with you
for Halloween.

The tombstone sat on a table as I looked at it for several days
in my bedroom, I would walk by it
and think,  I have all this space between the 
fence and the stone!  What am I going to do with it?

Then the ahah moment came.

A mini book!

I wanted to have a book without rings in the binding.
So it was quite a thinking process to get to this point.  Seriously,
I'm not kidding, you probably had this figured out 
weeks ago, but me, well, it took me a while to get here.

Here is the finished book inside the Tombstone Graveyard
with the fence.


To start the book,
I traced the shape of the tombstone, then cut the bottom off shorter,
so the book is the shape of the stone, and yet you can 
see the tall stone behind the book when it sits in that open space.


Then the back of the book is also short.  It takes 3 pieces 
next to each other to create the book.  The book is cut from
black distressed chipboard. 
This chipboard comes in 12x12 sheets and you can easily
one book from one sheet of 12x12 chipboard.


Then the binding edge of the book is cut out of black bat glitter
cardstock, then both edged cut with a border punch.
These 3 pieces are glued together to form the outside shape 
of the book.


I glued with extra heavy glue tape these 4 pieces together.
This is the base for the outside of the book.


Here are all the finished pages glued to each other.
I took a 12 x12 sheet of Robin's Nest printed cardstock
and folded it in half, traced my pattern, then cut out the page
with the fold in the center of the sheet so it will open up.


This is the back side of the book with all the finished pages
 before I glued it into the base of the book.  Easy!


Here is the book with the binding base glued together.

Now,
The front cover of the Tombstone book.


I used Black Glitter Trees CS as the cover
Then cut out the Wicked from my Cricut welded the letters
together from Glitter Orange Crackle CS.
I used EK Embellishments
with Gina's Designs Doilies
Black 6mm dew and tear drops
Orange Crackle Glitter CS for the rosette
and book pages.


Here the book is sitting inside the tombstone graveyard
so you see the rosette on the book and the rosette on the graveyard fence.


Here is the binding of the book, I placed an eyelet in the edge of
the book and brought all the ribbons through the eyelet
to let them hand down the edge of the book.


Here is a video of the finished book.
My first video for the blog!
I ran out of memory on my card by the last page,
but you can see the page.

I used so many elements, made lots of tags, journaling tags,
and pockets, you need to watch the video to see 
all the fun elements of the book.


Enjoy!!!!!

Products for this book can be found on the 
Robin's Nest website.


Just look for the Halloween line.

Have a Happy Halloween season!

Ciao,
Robin

I apologize the pictures aren't that great,
only have the small camera with me today.
Here are the pages in my book,
they are shown and described much better on the
video.

Happy Halloween.