Showing posts with label Crafts. Show all posts

Sunday, November 18, 2018

Thanksgiving Box

Preparing for Thanksgiving 
and visitors is always fun for me.
I love to be with family during this time.

This year I decided to make a box.
My Thanksgiving box is for our thoughts on
our blessings.  Each family member will
add to this either with a picture colored by little hands
or their personal take on blessings in their life.
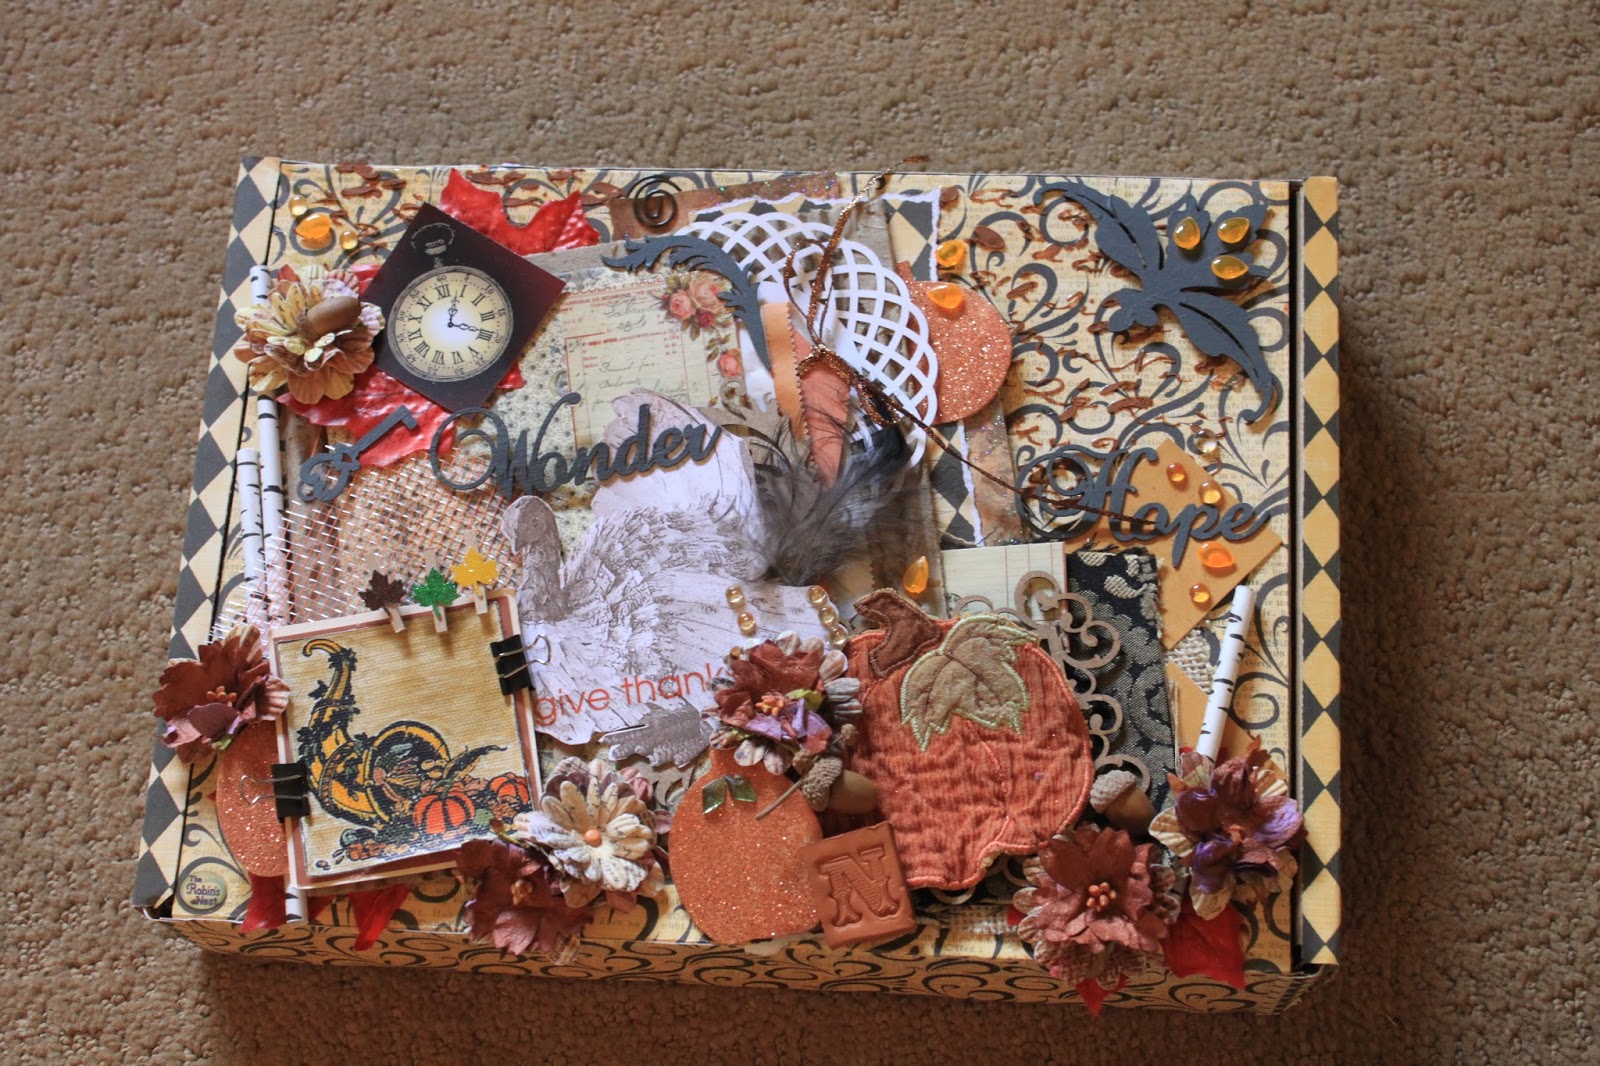

As I was working with this box,
by the way, it is a hamburger box, When I purchase
hamburgers they come in a box, and I have been
saving boxes for a while with the plan to do something fun.
So, as I was working on this box, I decided
to bring to it a lot of collectibles that I have been saving
for many years and never use.
So as I was working on the box, I felt that the Saffron Sunrise line
would be great for Thanksgiving colors and style.


I started with Saffron Sunrise cardstock.
The yellows and deep grays are the colors I was wanting
for background colors.
So I covered the box in these papers.
I just used elmers glue to attach the papers to the box.

Saffron Diamond Cardstock  Saffron Sunrise Cardstock

Then after the papers are glued to the box,
I used dimensional paint, and painted these letters
with a plastic template.


This was so fun and easy to do, and a new
technique for me in my scrappy room.

I then started adding papers, and items.
On this box I used quite a few cut chipboard from
Gina's Designs.
Love her work!


My additions to the front of the box came from many different eras in
my life.  A piece of fabric, a pumpkin cut from an old
kitchen towel, flowers I sprayed from purple to rust,
a leather N, a feather given to me from my mother in law
at least 30 years ago, acorns from the trees in my backyard.


But most important what is on here from The Robin's Nest?

Autumn Leaves Fall Rub-on Maple Leaves Paper Clips

Turkey Canvas Turkey Glitter Cardstock  Sunkissed Tear Drops

Pumpkin Glitter Chipboard  Rusty Rose Cards Birch Tree Paper Straws

Saffron Sunrise cardstock, And dew drops and tear drops!!


I just discovered a few minutes ago that 8.5x11 paper fits inside the box!!!!

YeahHHH !!!!!

I can't wait for Thanksgiving week, when we are gathered together
with our son and his family, we will spend an evening writing our blessings
and things we are thankful for.

Have a wonderful Thanksgiving!

And as they say in Georgia,
May your life be Blessed!

Ciao,


Robin

Sunday, November 4, 2018

How to make Velvet Pumpkins

Can you believe it is November?
I truly am in shock!  I love the fall season, it is one of my favorites,
the cooler weather, sweaters, hot chocolate, fall colors, and well
the list just goes on!

Today I am sharing with you some cute faux velvet pumpkins I made
for my home.  I looked all over for real velvet in the fall colors
but alas, there was only black and red velvet in our local
stores.  So the next best thing was to buy a velvet looking fabric
to make my pumpkins with.


I chose rust, grey, cream, honeycomb, brown, and beige.

The first thing you do is cut a round circle.
I used a charger plate as my circle, and traced around it on the 
fabric and then I cut them out.

For various sizes I used plates and bowls and traced around
them on the fabric then cut out the different sizes.


I then sewed around the edge of the fabric with a needle and heavy thread
and pulled it tight to get the shape above.


Then I filled the pumpkin with polyfiber fill and pulled the thread tight and sewed 
the circle shut.


Here are a few of the pumpkins not finished on my work table.


Now I have glued with a hot glue gun a dew drop on the pumpkin.


Here I have glued dew drops around the pumpkin, all with a 
glue gun.  Just a small dot of glue is plenty.


Then I glued a pumpkin stem on the top of the pumpkin over
the area where the pumpkin is sewed together.

I have been saving pumpkin stems for a while, because I wanted
to make these.  You could buy pumpkins from the store and use
the stem, or save your stems from this year for next years pumpkins.

I also used branches for the tops of some of my pumpkins.
I will show these in some other photos on this post.


I added ribbons, faux leaves dew drops, and old jewelry to the tops 
of these cute pumpkins.


Close ups of some, I added old crocheted doilies also to 
some of the tops of the pumpkins.


They can be displayed all over your house.
These are on the countertop in my kitchen.


And I added some of them to my china cabinet.

Such a fun way to add fall to your house,
I've wanted to make these for a few years, and finally this year
was the year.

You can find dew drops on our website

www.shop.robinsnest-scrap.net

Just click on this link and it will take you to the Robin's Nest
web page.  I used amber colored dew drops,
but other colors would be so fun also.


Happy Fall!!!

Robin

Wednesday, May 13, 2015

Recycled Boxes

Hello there!

Today I wanted to do something a little different.

I have been saving these old boxes forever,
and today I covered them with paper.
Sorry I didn't take pictures of the old boxes.
they were pretty dated!

I chose black, white, and grey.

I love how the new papers go with the old papers.


These are the 3 cardstock papers I used,
Smoky Chevron, Black on White Damask, and Silver on Black Paisley

Black on White Damask Thermal CardstockSilver on Black Glitter Cardstock
Smoky Chevron Cardstock

I traced the boxes, and covered the boxes with elmers glue.
Then glued the papers right on the box.


I then stacked the boxes and tied them with a sheer black ribbon 
with gold fleur de lis.  
Attached an "O" for O'Crowley.


This was simple and pretty easy,
I was done in a few hours.
And now I have cute, updated boxes to use in my house.

Have a great day!

If you click on the papers they will link you to the web site
where you can purchase these papers.


Have a great day!

Ciao,
                                                                             Robin

Monday, March 30, 2015

Beautiful Italian Recipe Holder

Welcome to the Robin's Nest Blog Hop!

Today is our Bi-annual Blog Hop!
Our theme this Blog Hop is Recipes. 

I admittedly am not really a cook. so when I read that 
the theme was recipes, I gasped!
What am I going to do?

I thought and thought,
Should I make a recipe book?
Should I show my favorite recipe?
Should I bough out?
Really, that was the best option.

But, I went in the scrapbook room, 
and started working on other projects, trying to get
myself motivated to make this post,
and I remembered Gina's Designs, an easel
type thing that I have been saving for a special project.

This is IT!!!!

So, just as we have finished new counter tops and backsplash
for our kitchen, the new papers were produced
a few months ago, and it all became real,
and my recipe holder is now finished, and I 
love it!

I hope you do too.

I started with Gina's Designs Easel.


 I then painted the scroll work,
and glued the back of Saffron Honey Linen CS
on the face of the easel.


Then after that I used another sheet of  Saffron Honey and
cut out the larger designs from the paper individually.

I popped them with pot dots and glue dots.


It is hard to see here all the elements that are 3 dimensional.
But in the next few pictures hopefully you will be able to see
the dimensions in the holder.


Here is one of the cut out pieces from the Saffron Honey Linen CS.


On the other side of the recipe holder, is Recipes (spelled wrong)
I found out when I was posting!  I will fix that.
And a few elements just made with papers from the new
Saffron Sunrise product line.

Here you can see the pop out of the "fountain".


More of the holder, papers, dew drops, and Eiffel tower over
in the corner from one of our stickers. 

I made a little twirly with Black Diamond drops, 
and a gold dew drop.
The gold and black dew drops, with the black glitzy strawy ribbon
 come from a embellishment pack called Saffron Straw.


Just a few more shots of the recipe holder


The rose is cut from the Saffron Honey Linen paper too,
I love how the linen show on the rose,
and I love how the linen paper feels!


Here again is the finished recipe holder,
next to it is a recipe book that Rachel made for 
each member of our family a few years ago,
It has recipes in it from all members of the family,
and all ages,


Some fun memories in this book,
how to kill a moose and made dinner,
marshmallow sandwiches,
and much more,
the little kids had such fun ideas,
and it is such a fun recipe book.

I hope that you have a great day,
that you have found lots of ideas on recipe ideas,
and have enjoyed this post.

I love to hear your comments!
Follow me,
there is so much more to come!

You can find these products on
The Robin's Nest website
www.robinsnest-scrap.com

Ciao,

Robin